OpenVAS, also known as Greenbone Vulnerability Management, remains one of the most widely used open source vulnerability scanners available for Linux. It provides strong scanning capabilities, a flexible reporting system, and a complete framework for evaluating security weaknesses across hosts, networks, and services. Analysts preparing for the CySA+ certification or defending real environments benefit greatly from learning how to install, configure, and operate OpenVAS.
This guide explains how to install OpenVAS on a Debian based system (Kali), how to complete the initial setup process, and how to resolve common feed issues. It also covers creating your first vulnerability scan using the Greenbone Security Assistant. All demonstrations were performed on a Debian host in a lab environment, but the workflow applies to most modern Linux distributions that provide Greenbone packages.
Installing OpenVAS on Kali Linux
The OpenVAS scanner, its daemons, and the management components are included in the official Kali repositories. This makes installation simple, as there is no need to compile from source or add external package sources. On a Kali Linux system, start by updating the repositories and installing the Greenbone Vulnerability Management package.
sudo apt update
sudo apt install gvm -y
Once installation completes, run the GVM setup script. This process initializes the scanner, configures certificates, creates the admin account, and begins pulling the vulnerability feed. The feed contains detection rules and scripts that allow OpenVAS to identify security issues. Without this feed, the scanner will not operate correctly.
sudo gvm-setup
Depending on your system performance and internet connection, this can take several minutes. After the setup finishes, check the environment to verify the scanner, manager, and web interface are working.
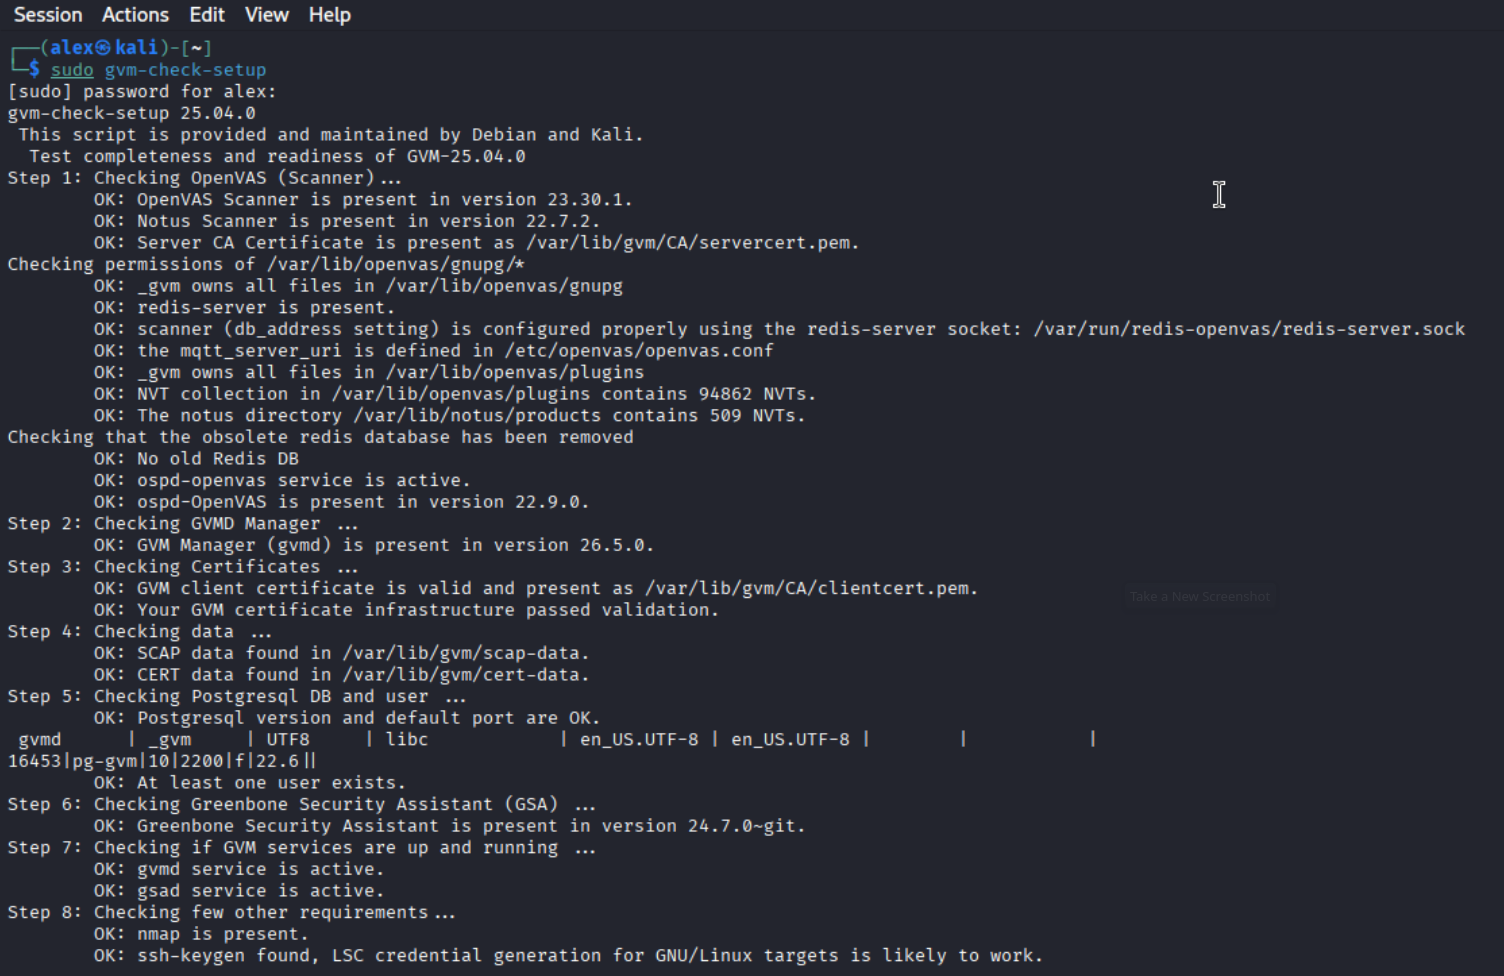
sudo gvm-check-setup
Checking the OpenVAS installation and service status after running the initial setup script.
Feed Synchronization and Common Issues
Greenbone scanners rely heavily on synchronized data feeds containing vulnerability definitions, detection scripts, port lists, and scan configurations. One of the most common issues after installation is missing scan configuration profiles. This usually happens when the feed has not completed its initial sync.
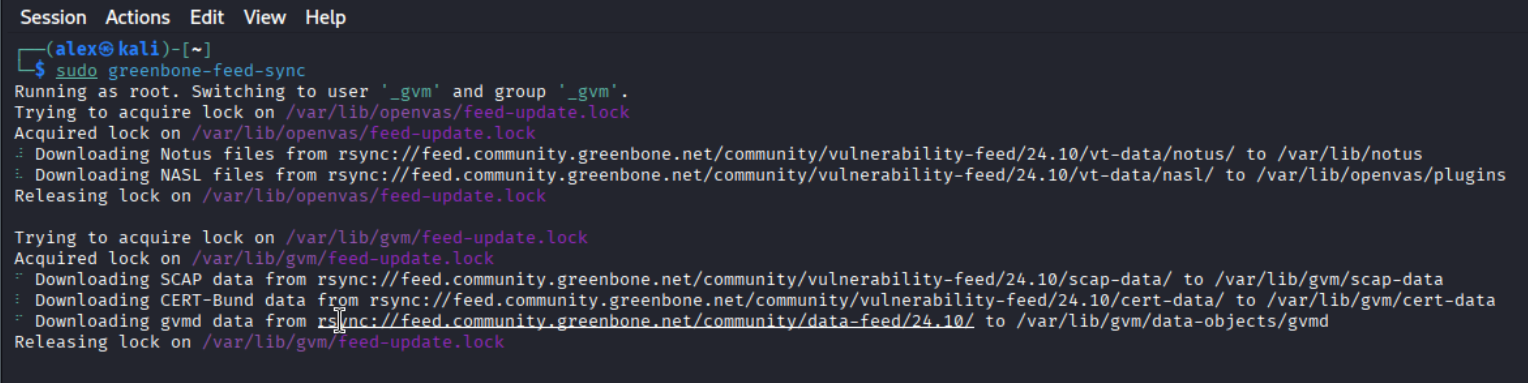
If the Greenbone interface reports missing configurations or refuses to create tasks, manually synchronize the feed using:
sudo greenbone-feed-sync
Once the synchronization completes, rebuild the management database so the new feed data is recognized.
sudo runuser -u _gvm -- gvmd --rebuild
After rebuilding the database, restart the Greenbone services to load the updated information.
When the feed is fully synchronized, the standard scan configurations will appear inside the Greenbone Security Assistant. These include Host Discovery, Full and Fast, and Web Application Scan. With these available, the scanner is ready to use.
To access OpenVAS, open a browser and navigate to the Greenbone Security Assistant on port 9392.
https://localhost:9392
Log in using the admin credentials created during setup. Before launching a scan, create a target. A target defines the system you want to evaluate. You can specify a single IP, a hostname, a CIDR range, or even multiple hosts depending on your lab setup.
After creating a target, navigate to the Tasks section and add a new task. Select the scan configuration, assign the target, name the task, and save it. The Full and Fast scan type is recommended for general scanning because it provides strong coverage while keeping scan time reasonable.
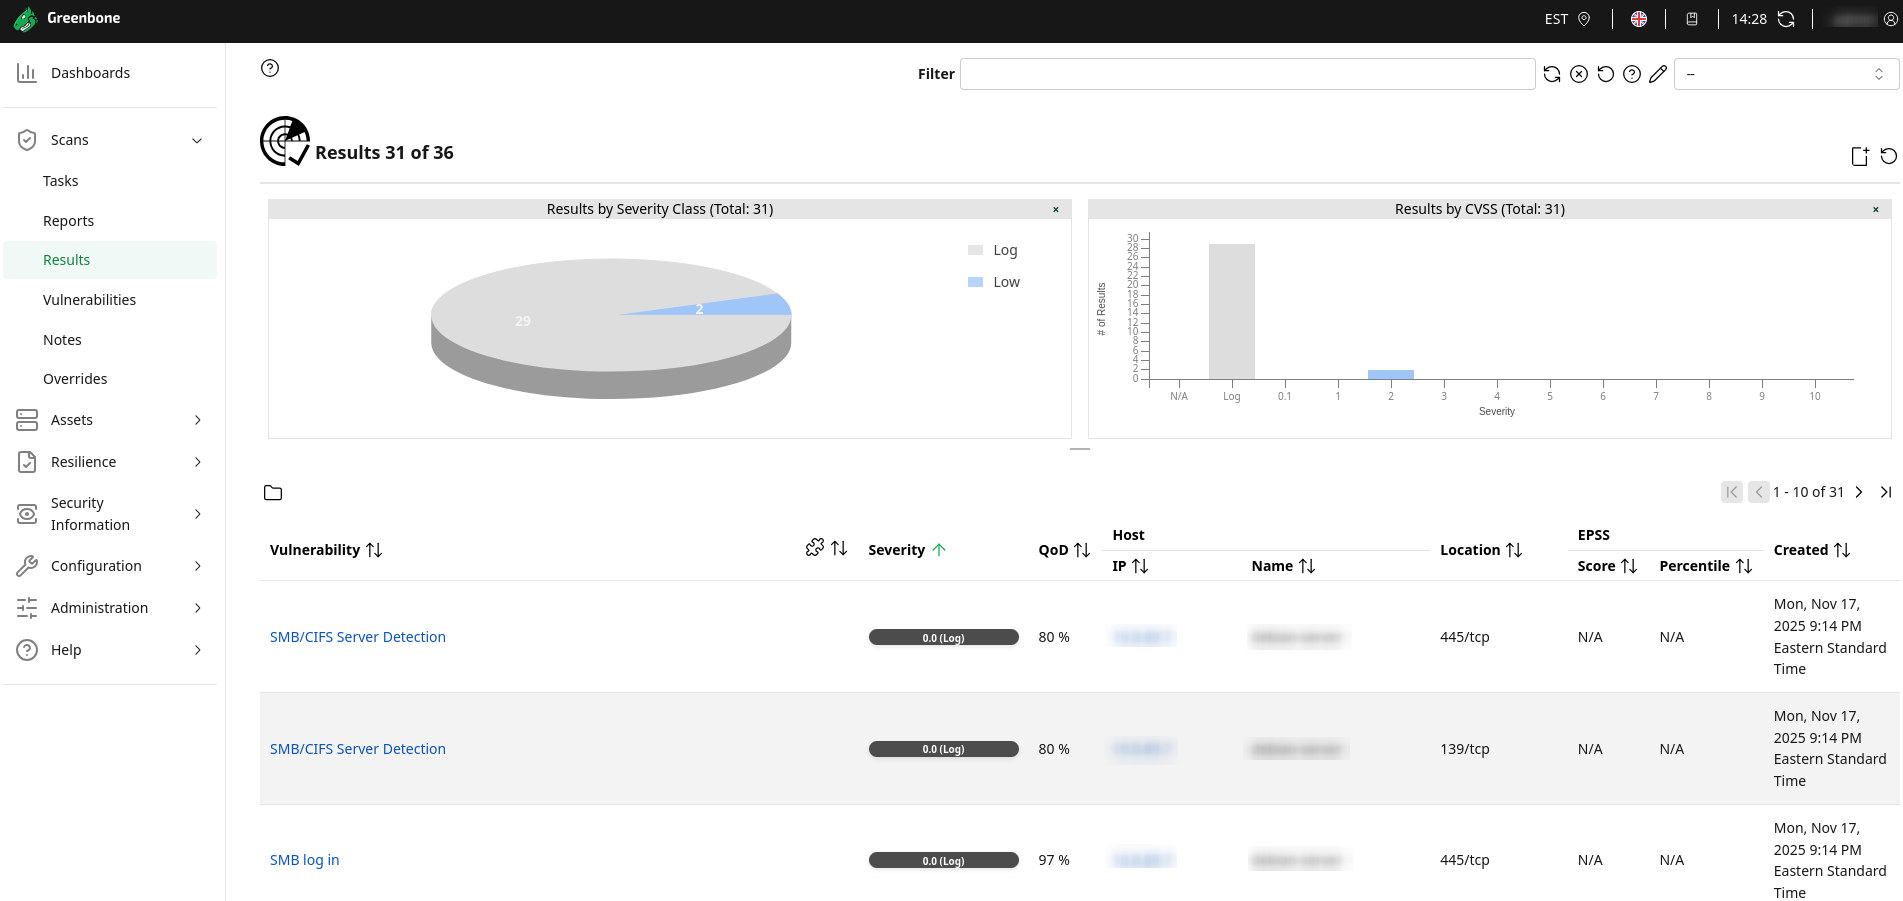
Start the task to begin scanning. The interface displays real time progress, severity breakdowns, and detailed findings. Results include descriptions, affected services, and mitigation recommendations. This makes OpenVAS valuable not only for discovering vulnerabilities but also for understanding how to fix them.
Viewing the results of a vulnerability scan using the Full and Fast configuration.
Why OpenVAS Matters for CySA+ and Real World Security
OpenVAS provides a complete vulnerability management workflow that helps analysts build practical skills. It allows users to identify outdated software, detect insecure configurations, and verify the effectiveness of patches. For CySA+ candidates, hands on experience with vulnerability scanning tools is essential. OpenVAS offers everything needed to practice these skills in a home lab without requiring commercial licenses.
Open source scanning tools also provide insight into how automated assessments operate. Understanding how scans are performed, what they detect, and how results are structured strengthens the ability to interpret vulnerability data. Whether used for training or real assessments, OpenVAS remains a trusted and effective platform for continuous security analysis.