User shell startup files are a low-noise persistence vector attackers commonly use to regain access after an intrusion. Files such as
~/.bashrc, ~/.profile, ~/.bash_profile, and global hooks like /etc/profile or
/etc/bash.bashrc execute automatically during login and shell startup, providing a reliable method for launching backdoors,
downloaders, or environment-level hooks without creating obvious services. This guide gives a defensive workflow to identify, triage,
and remediate malicious profile entries. The techniques are directly useful for incident responders, SOC analysts, and CySA+ candidates.
The examples and commands here are safe to run in isolated lab environments (Kali/Debian VMs) and are designed to help you quickly find
suspicious entries, decode obfuscated payloads, and map any wider persistence chain an attacker may have used.
Which profile files run and when
Knowing the startup semantics helps prioritize checks based on how the attacker wants their code to run. Common Bash startup behaviors:
~/.bash_profile >> executed for interactive login shells.
~/.profile >> fallback on some systems and used by graphical login environments.
~/.bashrc >> executed for interactive non-login shells (opening a terminal emulator).
/etc/profile and /etc/bash.bashrc >> global system-wide hooks that affect every user.
~/.bash_logout >> runs at logout and can be abused for cleanup or exfiltration routines.
Attackers commonly target ~/.bashrc for frequent execution and global files to persist across all users. Always inspect both user
and global files during triage.
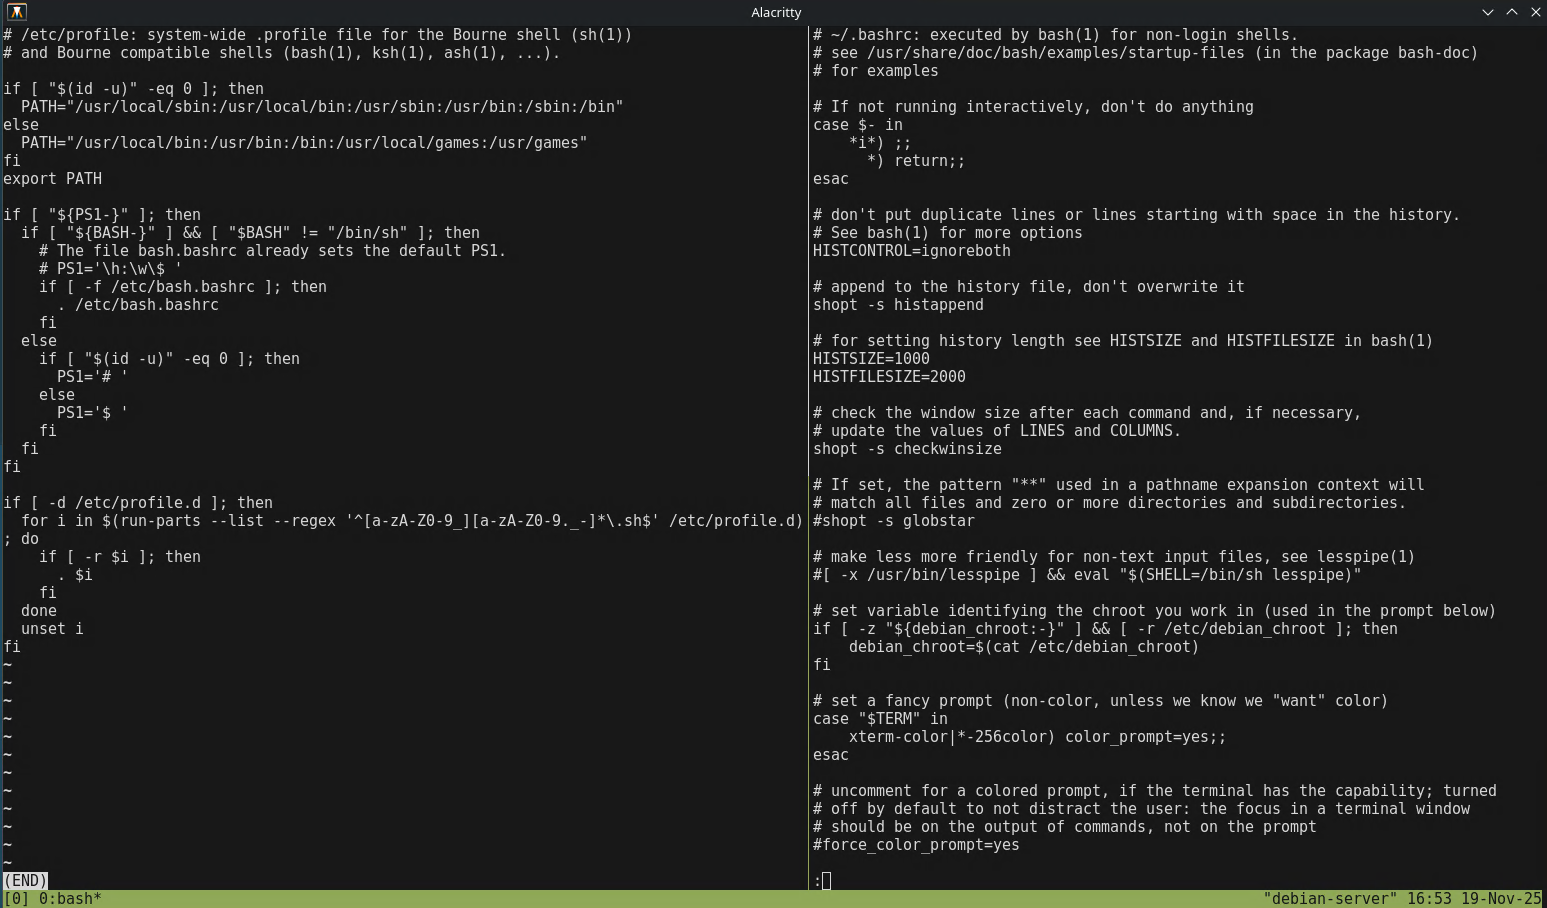
Example: Comparing user .bashrc with /etc/profile to find unexpected lines added by an attacker.
Representative malicious snippets
Below are realistic examples of entries analysts routinely find. Do not run these on production hosts as they are for detection and training only.
These may be obfuscated with Base64 or split across variables. Watch for eval, long encoded strings, or unusual uses of
nohup and backgrounding operators.
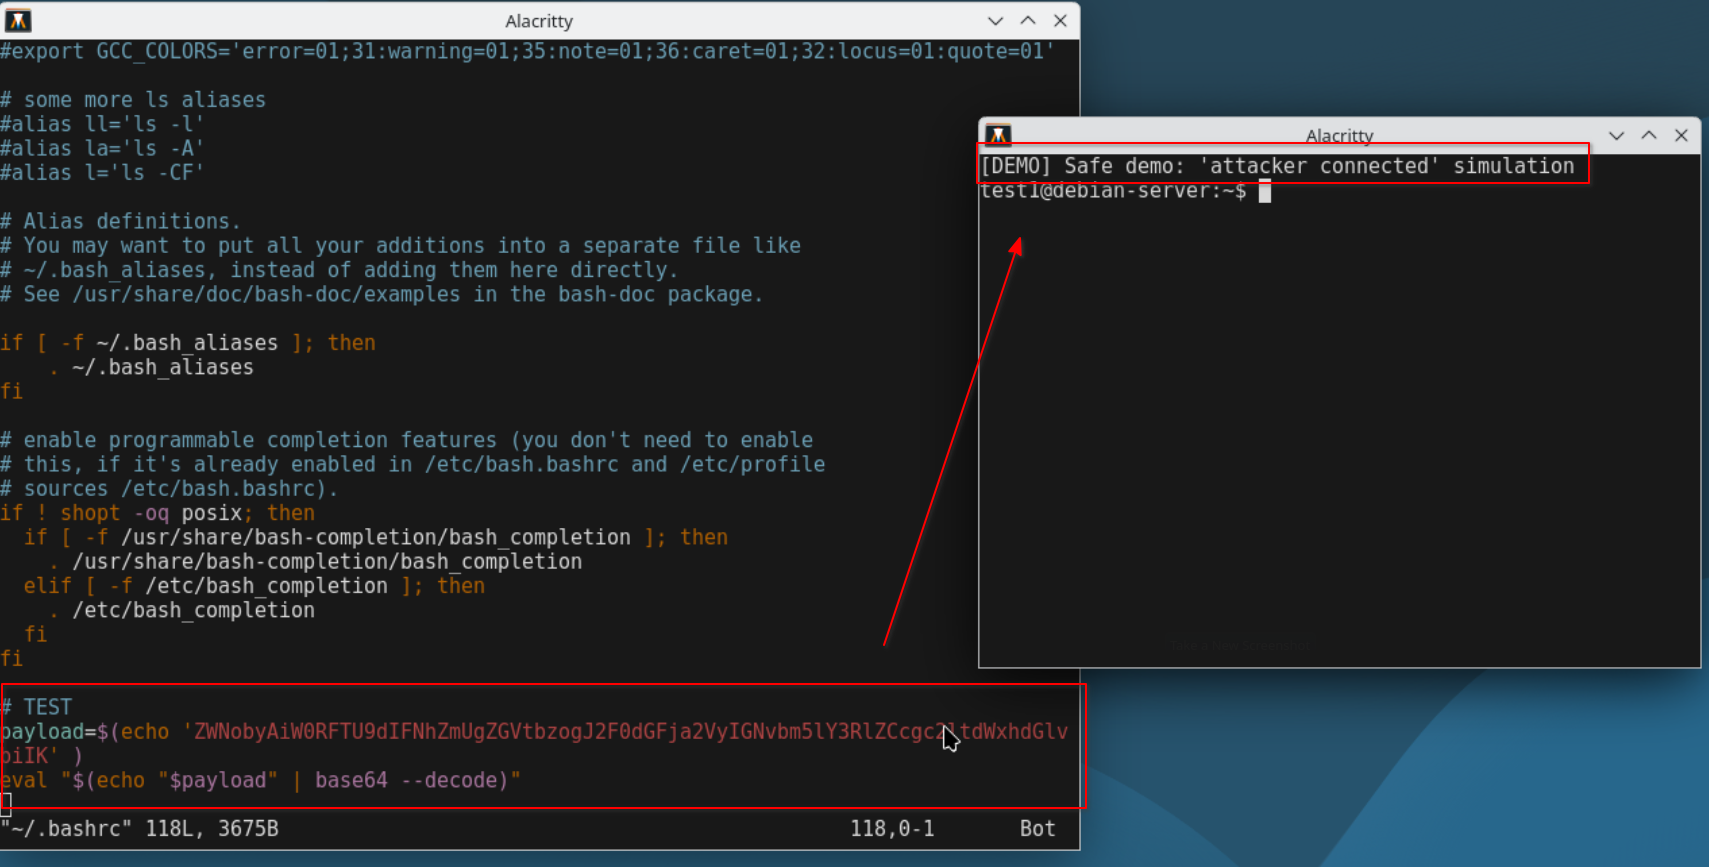
Demonstration of malicious persistence added to a user’s .bashrc file. Each new Bash session decodes and executes the embedded Base64 payload, producing the message seen in the screenshot.
Quick triage commands
When time is limited, these commands help find suspicious modifications across accounts and system-wide hooks:
# Searches common persistence points only
grep -R -I --line-number -E "(curl|wget|bash -i|/dev/tcp|nohup|eval|base64 -d|authorized_keys)" \
    /home/*/{.bashrc,.bash_profile,.profile,.bash_login,.zshrc,.ssh} \
    /root/{.bashrc,.bash_profile,.profile,.bash_login,.zshrc,.ssh} \
    /etc/{profile,bash.bashrc} 2>/dev/null

# List recently changed profile files (last 7 days)
find /home -maxdepth 2 -type f \( -name ".bashrc" -o -name ".profile" -o -name ".bash_profile" \) -mtime -7 -printf "%TY-%Tm-%Td %TH:%TM %p\n"

# Show lines added to global profiles
sed -n '1,200p' /etc/profile
Integrate these checks into your incident response playbook and add SIEM alerts for modifications to user profile files and ~/.ssh/authorized_keys.
Suspicious base64 exec identified in .bashrc.
Decoding obfuscation safely
Encoded payloads are common. Always decode in an isolated analysis VM. Please do not decode or execute on production hosts. Typical workflow:
Copy the file to a safe analyst VM.
Use grep -Eo "[A-Za-z0-9+/=]{40,}" to find long Base64 strings.
Decode offline: echo "..." | base64 -d | less.
Hash decoded artifacts and analyze them with static tools or in a sandboxed VM.
Base64, hex, or compressed blobs often hide a second-stage downloader or direct command invocation. Treat any decoded network calls as IOCs.
Remediation checklist
After confirming malicious persistence, follow these remediation steps:
Isolate the host from the network immediately.
Collect forensic copies of the profile files and related artifacts (preserve timestamps and compute hashes).
Remove the malicious lines or restore from trusted backups and keep copies for analysis.
Rotate credentials for affected accounts and services.
If root was compromised or you cannot validate integrity, rebuild from known-good images.
Dotfile persistence is often a component of a broader intrusion, so ensure complete eradication before returning the host to production.
Relevance for CySA+ and defenders
Detecting and responding to persistence mechanisms like profile modifications is a core defensive skill covered in CySA+ objectives. It requires
quick triage, safe handling of artifacts, decoding obfuscation, and mapping the broader attack chain which are all essential capabilities for SOC analysts
and incident responders. Implement file-integrity monitoring for user directories, alert on ~/.ssh/authorized_keys changes, and enforce
configuration management to minimize this attack surface.